Whenever I pick up my camera, I can’t help but notice how blue light shapes the mood of a photo. It’s everywhere—from bright midday skies to the glow of digital screens—and it can make or break the atmosphere I want to create. Sometimes, blue light adds a cool, dreamy vibe, but other times it leaves my images looking harsh or unnatural.
That’s where filters and creative effects come in. With the right tools, I can control how blue light appears in my shots, either softening its impact or using it to highlight certain details. Exploring these options opens up a whole new world of possibilities for my photography.
Understanding Blue Light in Photography
Blue light holds special significance in photography, especially because it affects both image style and visual health. I see blue light as a section of the visible light spectrum, typically ranging from 400 to 500 nanometers, according to the American Academy of Ophthalmology. Daylight and electronic device screens, like smartphones and monitors, emit high levels of blue light.
In photographic settings, blue light shapes the mood, saturation, and clarity of a shot. Early-morning or late-evening scenes often feature prominent blue tones that create peaceful or distant effects. Studio flash units and LED lighting also increase blue light exposure in image-making sessions.
Prolonged exposure to intense blue light during editing, especially on digital displays, often leads to eye strain, fatigue, and sleep disturbances, as documented by the Vision Council and Harvard Health. I always recommend using blue light–reducing glasses or screen filters to address these issues and maintain eye comfort during lengthy photography or post-processing work.
Photographers and viewers both experience the influence of blue light. Human eyes respond differently to blue wavelengths, often perceiving extra sharpness and coolness, making blue hues stand out more in images displayed on digital screens. Filters and lens coatings help manage color temperature and reduce unwanted glare, which optimizes the visual output and safeguards eye health.
Understanding how blue light interacts with both cameras and human biology opens new possibilities. Managing its presence lets me maintain creative control while prioritizing the visual well-being of both creators and audiences.
The Role of Blue Light Filters
Blue light filters play a crucial part in managing both image aesthetics and visual comfort. I focus on how these filters not only transform the visual style of photos but also help protect eyes from the strain caused by excess blue light.
Types of Blue Light Filters
Physical filters cover camera lenses or device screens to selectively block or soften blue light wavelengths. Examples include screw-on lens filters, clip-on smartphone filters, and specially coated monitor covers. Software filters, like night mode or color temperature apps, shift digital display tones away from harsh blue toward warmer hues. I use blue light filtering glasses with advanced coatings that reduce blue light exposure during editing sessions, ensuring my prolonged screen time feels less fatiguing.
How Filters Affect Image Quality
Blue light filters alter photos’ color balance, warmth, and overall mood. When I attach a lens filter, I see cooler, vibrant blues replaced by softer, more natural tones, which prevents harshness in landscapes or portraits. Digital filters allow precise adjustments, minimizing loss of detail and maintaining control over contrast. Using the right combination—as with glasses plus on-screen filters—supports both image quality and eye health, creating a visually pleasing result that doesn’t sacrifice comfort or clarity.


Effects of Blue Light on Photographic Outcomes
Blue light shapes photographic outcomes by influencing both technical and creative aspects of images. I see its presence affecting everyday photography sessions, editing accuracy, and even the comfort of post-production workflows.
Color Balance and Temperature
Color balance in photography depends on how blue light interacts with other wavelengths in a scene. When unfiltered, blue light often creates cooler color temperatures between 5,500 K and 7,000 K, producing crisp, icy visuals, especially in open daylight or shaded environments. I adjust white balance settings or use warming filters to correct blue-leaning color casts, as too much blue can make portraits look unnatural or landscapes appear washed out. I notice that properly managed blue light maintains true-to-life skin tones and keeps skies and water vibrant without overwhelming the frame.
Creative Uses of Blue Light Effects
Creative uses of blue light effects allow me to establish specific atmospheres and moods in my images. I incorporate blue LED lights or direct natural blue hour light sources to evoke calmness, melancholy, or futuristic vibes—seen in cinematic night street shots or editorial portraits. Diffusion filters, blue gels, or post-processing tints let me highlight certain elements, such as cool rim lighting around subjects or surreal glows in urban scenes. Many photographers blend blue light with complementary warm tones, amplifying subject separation or guiding viewer attention. Each adjustment to blue light intensity or placement unlocks new creative directions while respecting the visual comfort of both myself and viewers.
Choosing the Right Blue Light Filter
Selecting the right blue light filter in photography depends on both technical needs and personal comfort. I consider filter type, effectiveness, and compatibility with my gear before making a choice.
- Lens Filters: Physical blue light lens filters, like screw-on or clip-on models, fit DSLR, mirrorless, and smartphone cameras. I use a screw-on blue blocking filter with my main lens when I want to reduce blue cast during outdoor shoots at twilight or dawn. Filters from brands like B+W or Tiffen offer precise color correction.
- Software Filters: Digital blue light filters, including in-camera picture profiles and editing apps like Lightroom, let me adjust blue channel intensity in post-processing. I activate night mode or custom white balance when previewing shots on my phone to reduce blue spectrum emission.
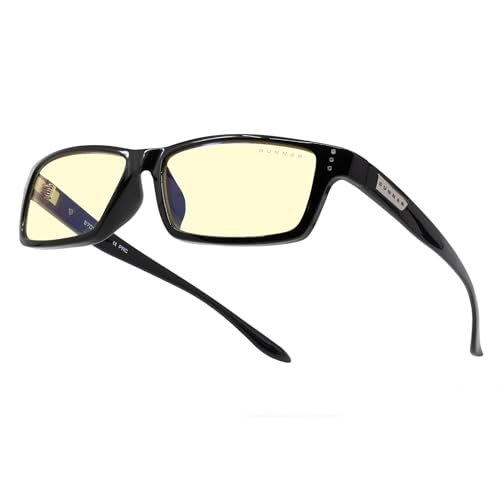
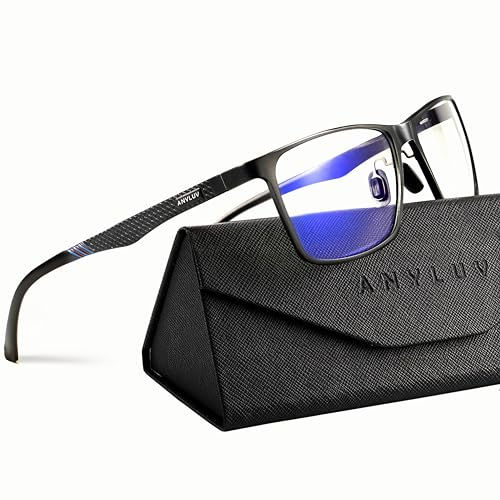
- Blue Light Glasses: Blue light glasses, with coated lenses from brands like Gunnar and Felix Gray, protect my eyes during extended screen time while editing. I always wear my preferred pair when reviewing images for long periods, especially under cool LED studio lighting.
- Screen Filters: Physical screen filters for monitors cut digital blue light directly at the display. I place a blue light–blocking film over my main editing monitor to minimize exposure during long retouching sessions.
- Compatibility and Color Balance: Blue light filters can slightly shift overall color balance. I calibrate my display and review histogram data to ensure accurate, natural-looking results after filtering.
- Quality and Transmission: Filter transmission rates, usually measured as a percentage, determine how much blue light gets absorbed. I choose filters boasting 80%+ blue light reduction for eye protection during marathon editing, referenced from ANSI and ISO standards.
By aligning filter selection with my workflow, photography style, and visual health priorities, I maximize both creative performance and eye comfort. I adjust my gear and accessories to keep blue light’s influence under control, no matter the shoot or screen.


Tips for Using Blue Light Filters Effectively
- Calibrate devices for accurate color
I always calibrate my monitors and camera screens before editing with blue light filters, since uncalibrated displays can exaggerate color shifts. Using calibration tools, like the X-Rite ColorMunki, keeps both color reproduction and filter effects consistent.
- Pair physical and software filters
Combining a physical blue light lens filter with editing software, such as f.lux or Adobe Lightroom’s color temperature settings, creates a controlled workflow. Software tweaks help fine-tune the look that hardware filters start, letting me achieve custom results for portraits or landscapes.
- Choose filter strengths based on conditions
I select higher-transmission filters, like 50%–70% blue light blocking, when ambient light is strong, for example during outdoor shoots at midday. For low-light interiors or blue hour settings, I use lower-transmission options, often under 40%, to keep images natural and avoid heavy color casts.
- Test filter effects with sample shots
Taking quick test shots with and without the filter reveals how the blue light filter influences mood and clarity. Side-by-side comparisons in editing software, such as Photoshop or Capture One, help me decide if the filter meets my creative or comfort goals.
- Prioritize visual comfort during editing
When editing for extended periods, I always use blue light glasses, like Gunnar or JINS, to prevent eye strain, since my focus is on visual health as much as image output. Short, frequent breaks every 20–30 minutes also prevent fatigue, no matter which screen filter or glasses I’m using.
- Document filter settings for future reference
Keeping a log of filter settings, for example in a photo journal or digital note, lets me replicate or fine-tune blue light results across multiple sessions and projects. This practice saves time and boosts both creative and physical consistency.
Conclusion
Exploring blue light in photography has really opened my eyes to how much control I have over the final look and feel of my images. With the right filters and a thoughtful approach I can shape the mood of my photos while also looking out for my own comfort during long editing sessions.
Experimenting with different tools and techniques lets me push my creativity further without sacrificing clarity or well-being. I love knowing that with a bit of planning and the right gear I can keep both my images and my eyes in great shape.